To continually improve our product quality and efficiency in production, PFI Precision, Inc. invests a large amount of time and money into the research and development of new manufacturing strategies and techniques. This helps us hone our skills as problem-solvers, and we often apply our knowledge to address specific manufacturing issues, especially those centered around the production of close tolerance parts.
One of our clients, an automotive component manufacturer, was responsible for producing a critical fuel pump component. They were struggling with significant quality issues in their own manufacturing process, which resulted in a very expensive scrap rate of about 30% for out-of-tolerance conditions. The domino effect took its toll on production, and they were experiencing undesirable cost overruns and capacity issues that were causing up to eight week delays on delivery to a major automaker.
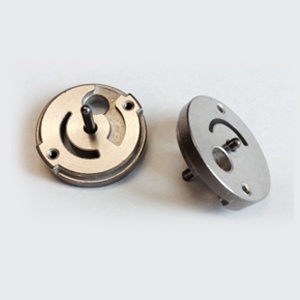
Aware of our technical proficiencies, they approached us for assistance. Our engineers assessed the situation and developed a strategy for consistently machining both faces to within the specified ±0.0002” flatness tolerance and then auto-inserting the pin with ±0.0002” perpendicularity to the face. However, to implement this process in the most efficient way possible required an equipment purchase. We identified a small CNC lathe that we could program to repeatably achieve the tight tolerance requirements on this 1.5” diameter work piece. We needed a total of four machines to attain the required throughput rate.
Within four weeks, we had two of the machines fully operational and the work cell running at 50% capacity, and in another four weeks we installed the rest of the machines and were running all four machines at full capacity. We also developed a rigorous system of checks to ensure that the products were within specifications and free from any defects that would warrant rejection. Quality control inspections involved the use of air and depth gauge tools which provided the most effective means for making precise, high-resolution measurements to ensure dimensional accuracy within such close tolerances.
Our ability to engineer a solution for this client resulted in a significant improvement in quality metrics, including a 0% scrap rate and 1.33 Cpk. The client appreciated our efforts and we continued to process this fuel pump component at the rate of 250,000+ units annually for four years.
